The chicken coop saga is a bit crazy as far as timing, but the building was really overall a smooth process. I spent well over a year looking at chicken coops. The search started before we moved to Coopers Flock Farm. I knew I wanted something that was big enough to grow a flock in, something that was easy to clean, and something that was pleasing to the eye! After searching and searching, I settled on a coop from The Inspired Workshop. The coop has everything we wanted with very little modifications. For the post and plans from The Inspired Workshop, just click here! For our experience, keep on reading 🙂

The Inspired Workshop Chicken Coop
The best thing about these plans are that they are easy to follow and the material list is broken down simply. The Inspired Workshop will email you the plans and the plans are broken down into sections. The only issue we had was when it came to the roof. We have never built
anything and found that part of the plans a little vague, but we worked it out!
We started to build the coop in the pole barn.


Above is my sister using the Kreg jig. It took us quite a few YouTube videos to figure out how to use it right.
We had many great evenings with friends and family working on it.

I will attempt to put pictures within this post, but be warned, they are not the best pictures lol! I do want to note that we were taking our time until I saw chicks at Farm and Fleet and brought them home. That sure lit the fire under our butts to get it done!

Full disclosure, we didn’t finish before the chicks left the brooder. I ended up buying a small coop to get us by. More on that in an upcoming post!

After we built the walls, my husband had a great idea to put the frame on steel bars with wheels so once it was together, we could wheel it back to its destination.

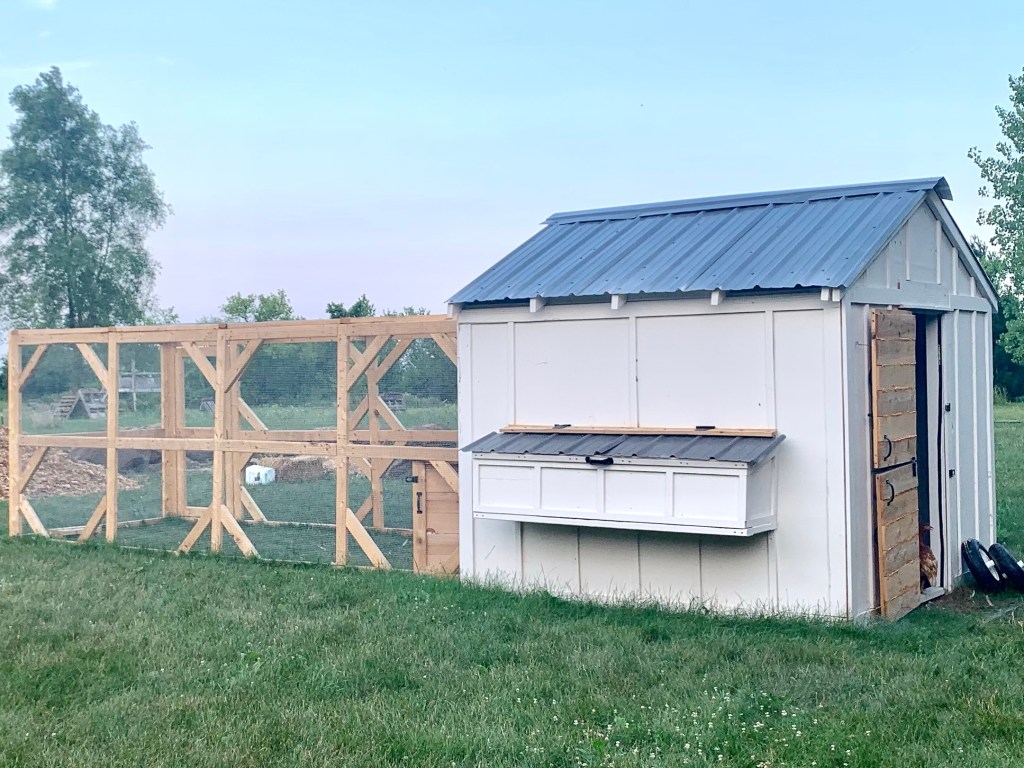
The only big modification we made during the build was to add a door to the run wall so it could be completely closed up at night.

After it was almost all built, I rolled it out and used a sprayer to paint it. After it dried, I added the doors and shutters.
Before we placed the coop and run together, we added a foot of 1/4 inch hardware cloth on the ground all around the coop and run. The purpose of this is to deter anything from digging into the coop or run. So far, this has worked great!

Here is a photo of the hardware cloth on the outside of the coop.
When it was all together, I did regret not doubling the size of the chicken run. This isn’t the biggest deal because our chickens generally free range everyday.

There have been times when we had issues with predator’s and during those times, the chickens are not allowed to free range for the following week or two. This has seemed to let the predator know the kitchen is closed. I do plan to expand the run in the future.

After all was complete, I added 2×4’s for roosts and plywood on the inside in front of each door to keep the bedding in.

Above you can see the roosts, plus the piece of wood in front of the nesting boxes to keep the bedding in. To the left, the plywood to keep the bedding in (some of it anyway lol)
Winterizing the coop
We didn’t do much to winterize the coop. We are located in southeastern Wisconsin and have very cold winters.

I did remove the shutters and screwed one large piece of plywood over the screen to keep out any draft. We use deep litter with wood chips, leaves and fallen evergreen needles that raises the temp slightly while it breaks down over time. The water was kept outside to prevent moisture build up inside. I had read a few times that as long as you had 10 chickens they could keep each other warm. We had 15 and lost none to the cold. I did give them corn and chicken scratch before they roosted for the really cold nights.
Just a heads up on cost…
This was built in 2021. Our cost was around $2500 – $3000 which included all materials (plus extras for mistakes) and some tools. During the build our miter saw broke and we needed to purchase a new one, we needed new blades for the circular saw, purchased a kreg jig and a Sawzall. We hadn’t planned on it costing that much, however the price of lumber jumped up before our build.
Let me know your thoughts and your coop adventures by commenting below!

Leave a reply to Chicks 101: Supply check list – Coopers Flock Cancel reply